Docker Installation
Zammad can be deployed using Docker Compose. You can even use graphical Docker front ends like Portainer.
INFO
Не пружамо техничку подршку у вези проблема са Docker (Compose) или Portainer инсталацијама. Уколико одлучите да користите Zammad путем Docker-а, подршка је могућа само за Zammad апликацију.
Предуслови
Радно Docker Compose окружење
Најмање 4 GB RAM за контејнере
Increase the memory limit for Elasticsearch on Linux hosts:
shsudo sysctl -w vm.max_map_count=262144
Покретање преко Portainer-а
The easiest way to get Zammad running is via a graphical Docker UI. We recommend Portainer. For installation instructions, check out Portainer's documentation.
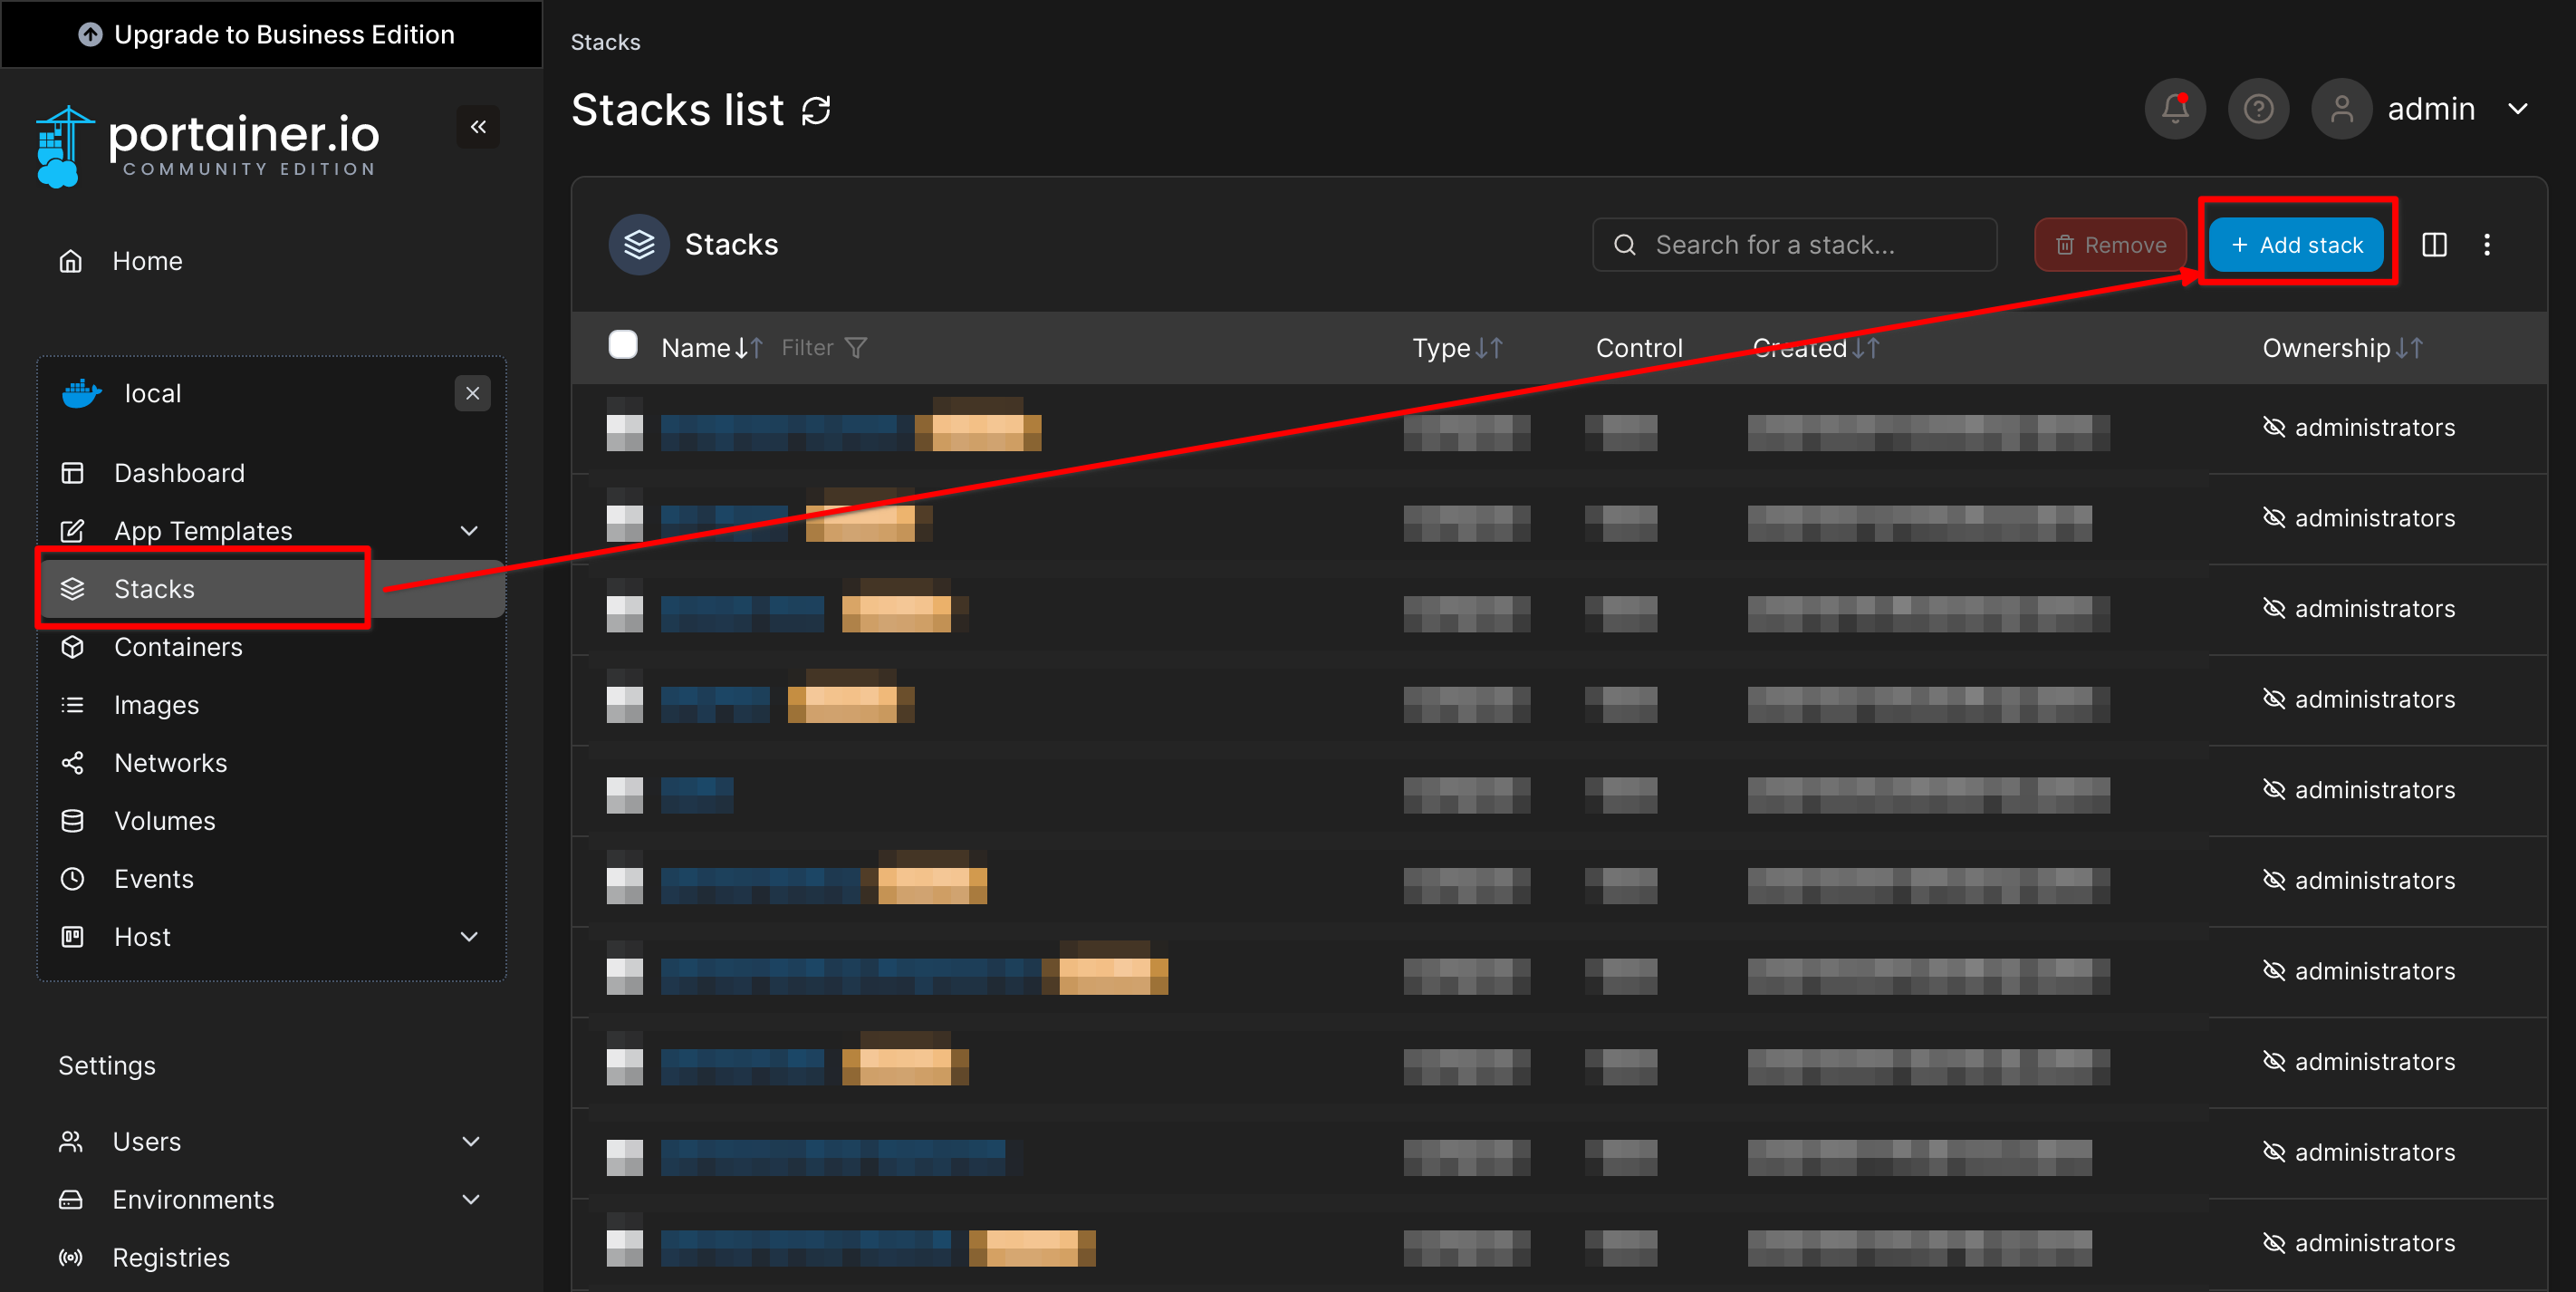
Корак 1: Додавање stack-а
In the Portainer GUI (e.g. https://yourdomain.tld:9443), choose your target environment, select Stacks and click on Add stack as you can see in the screenshot below.
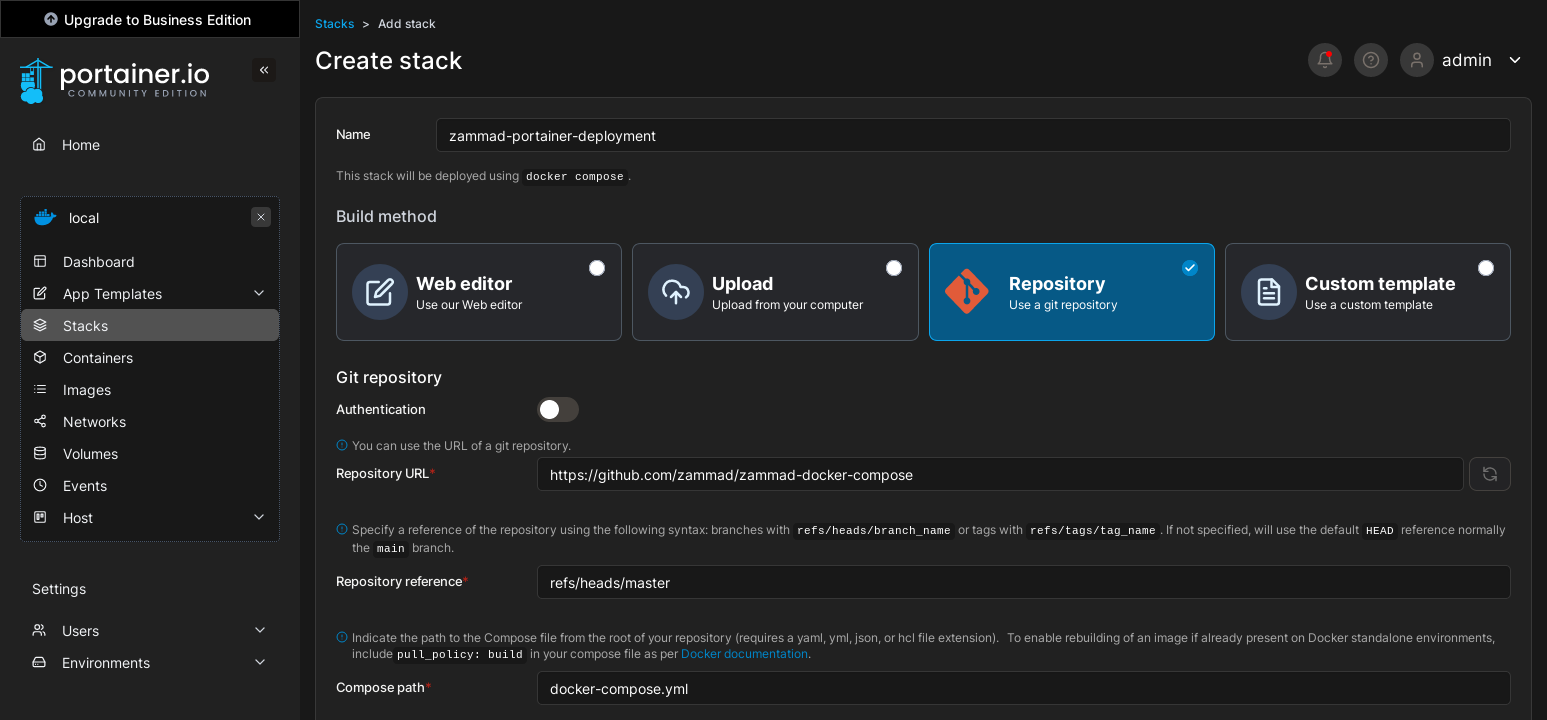
Корак 2: Инсталација из репозиторија
Switch to Repository build method and provide the information below:
- Name: enter a desired name of the stack
- URL адреса репозиторија:
https://github.com/zammad/zammad-docker-compose - Repository reference:
refs/heads/master - Compose path:
docker-compose.yml(default)
In case our default environment is not what you are looking for, you can customize the stack using predefined scenarios and adjust environment variables. Jump to the customization section below to find more information.
Корак 3: Покретање stack-а
Finally, click Deploy the stack button. The first time, it may take some time until the Docker images are fetched.
After the stack is ready, you can access Zammad via the configured Docker host and port, e.g. http://localhost:8080/.
Deployment with Docker Compose
Корак 1: Клонирање GitHub репозиторија
git clone https://github.com/zammad/zammad-docker-compose.gitMake sure to run git pull frequently to fetch updates. Alternatively, you can download the files from the releases page.
Корак 2: Подешавање окружења по потреби
In case our default environment is not what you are looking for, you can customize the stack using predefined scenarios and adjust environment variables. Jump to the customization section below to find more information.
Корак 3: Покретање stack-а
cd zammad-docker-composedocker compose up -dOptional: Use an additional .yml file to use a pre-defines scenario. Read on in the Customizing the Zammad Stack section.
After the stack is ready, you can access Zammad via the configured Docker host and port, e.g. http://localhost:8080/.
Exposing the Stack via HTTPS
To publish a Zammad stack on the internet, it needs be secured via the HTTPS protocol. To achieve that without modifying the Zammad stack, you can:
- Use a reverse proxy like Nginx Proxy Manager (NPM). It has a GUI that provides an easy Let's Encrypt integration.
- Use a Cloudflare tunnel, which provides SSL termination.
Both scenarios are covered in the separate Docker Compose Scenarios page.
Прилагођавање Zammad stack-а
The Zammad stack can be customized by loading additional scenario files for common use cases. For example, you can deploy the stack with an included Nginx Proxy Manager (NPM) or with disabled PostgreSQL or Elasticsearch services, in case you already have these services running.
Please see the Docker Compose scenarios page.
To adjust the stack and settings, use Docker specific environment variables.
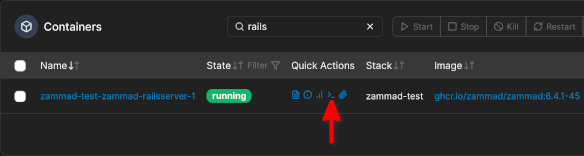
How to Run Commands in the Stack
Execute commands in your Docker stack by calling rails or rake via one of the following methods by using bundle exec.
In your Portainer GUI, go to the container view and select the running Rails container from your Zammad stack. Click on the Exec Console icon in the "Quick Actions" column, select the standard /bin/bash entrypoint and click Connect.
Run the interactive Rails console by executing:
bundle exec rails cDirectly execute a specific command:
bundle exec rails r '...your rails command here...'