Arbeiten an Tickets
Sie haben den Weg zu einem existierenden Ticket gefunden, herzlichen Glückwunsch! Schauen wir uns nun an, was Sie alles tun können.
Im Allgemeinen bedeutet die Bearbeitung bestehender Tickets, dass Sie die Kundenkorrespondenz in Form eines Verlaufs in der Ticket-Detailansicht führen. Jedes Mal, wenn Sie ein Ticket öffnen, erscheint ein neuer Tab in Ihrer Taskleiste auf der linken Seite. Um einen Tab zu schließen (im Sinne von aus der Navigationsleiste entfernen, nicht den Status des Tickets auf geschlossen setzen), klicken Sie einfach auf die Schaltfläche im Tab. Zammad speichert automatisch Ihre Änderungen in geöffneten Tabs, unabhängig davon, ob Sie die Änderungen bereits angewendet haben oder nur etwas bearbeitet haben und zu einem anderen Tab gewechselt sind. Es ist deshalb kein Problem, ein neues Ticket zu erstellen, während Sie an einem bestehenden Ticket arbeiten. Wechseln Sie anschließend einfach zurück in den anderen Tab.
Für die meisten Änderungen (außer z.B. Tags oder Titel umbenennen) ist eine explizite Aktualisierung des Tickets erforderlich. Klicken Sie dazu auf die Schaltfläche Aktualisieren auf der rechten Seite der Fußleiste, wenn Sie mit Ihren Änderungen zufrieden sind.
Ticket-Attribute ändern
Wie Sie vielleicht wissen, gibt es zusätzliche Ticket-Attribute wie Gruppe, Priorität und Besitzer, die Sie einstellen können. Schauen Sie sich dazu die Ticket-Grundlagen an, sofern Sie diese noch nicht gelesen haben.
Einen neuen Artikel erstellen
Egal, ob Sie einen komplett neuen Artikel erstellen oder auf einen Kundenartikel antworten, Sie können aus verschiedenen Artikeltypen wählen:
- Notiz: Schreiben Sie eine Erinnerung für sich und andere Agenten, stellen Sie einem Kollegen eine Frage, indem Sie einen Benutzer erwähnen, oder fügen Sie dem Ticket neue Informationen hinzu. Die Standardsichtbarkeit ist "intern", was bedeutet, dass Ihr Kunde die Notiz nicht sehen kann.
- Anruf: Notieren Sie eine Zusammenfassung eines Telefonats, das Sie mit dem Kunden geführt haben.
- E-Mail: Senden Sie eine E-Mail an eine beliebige Person zu diesem Ticket. Der Titel des Tickets wird als Betreff der E-Mail verwendet.
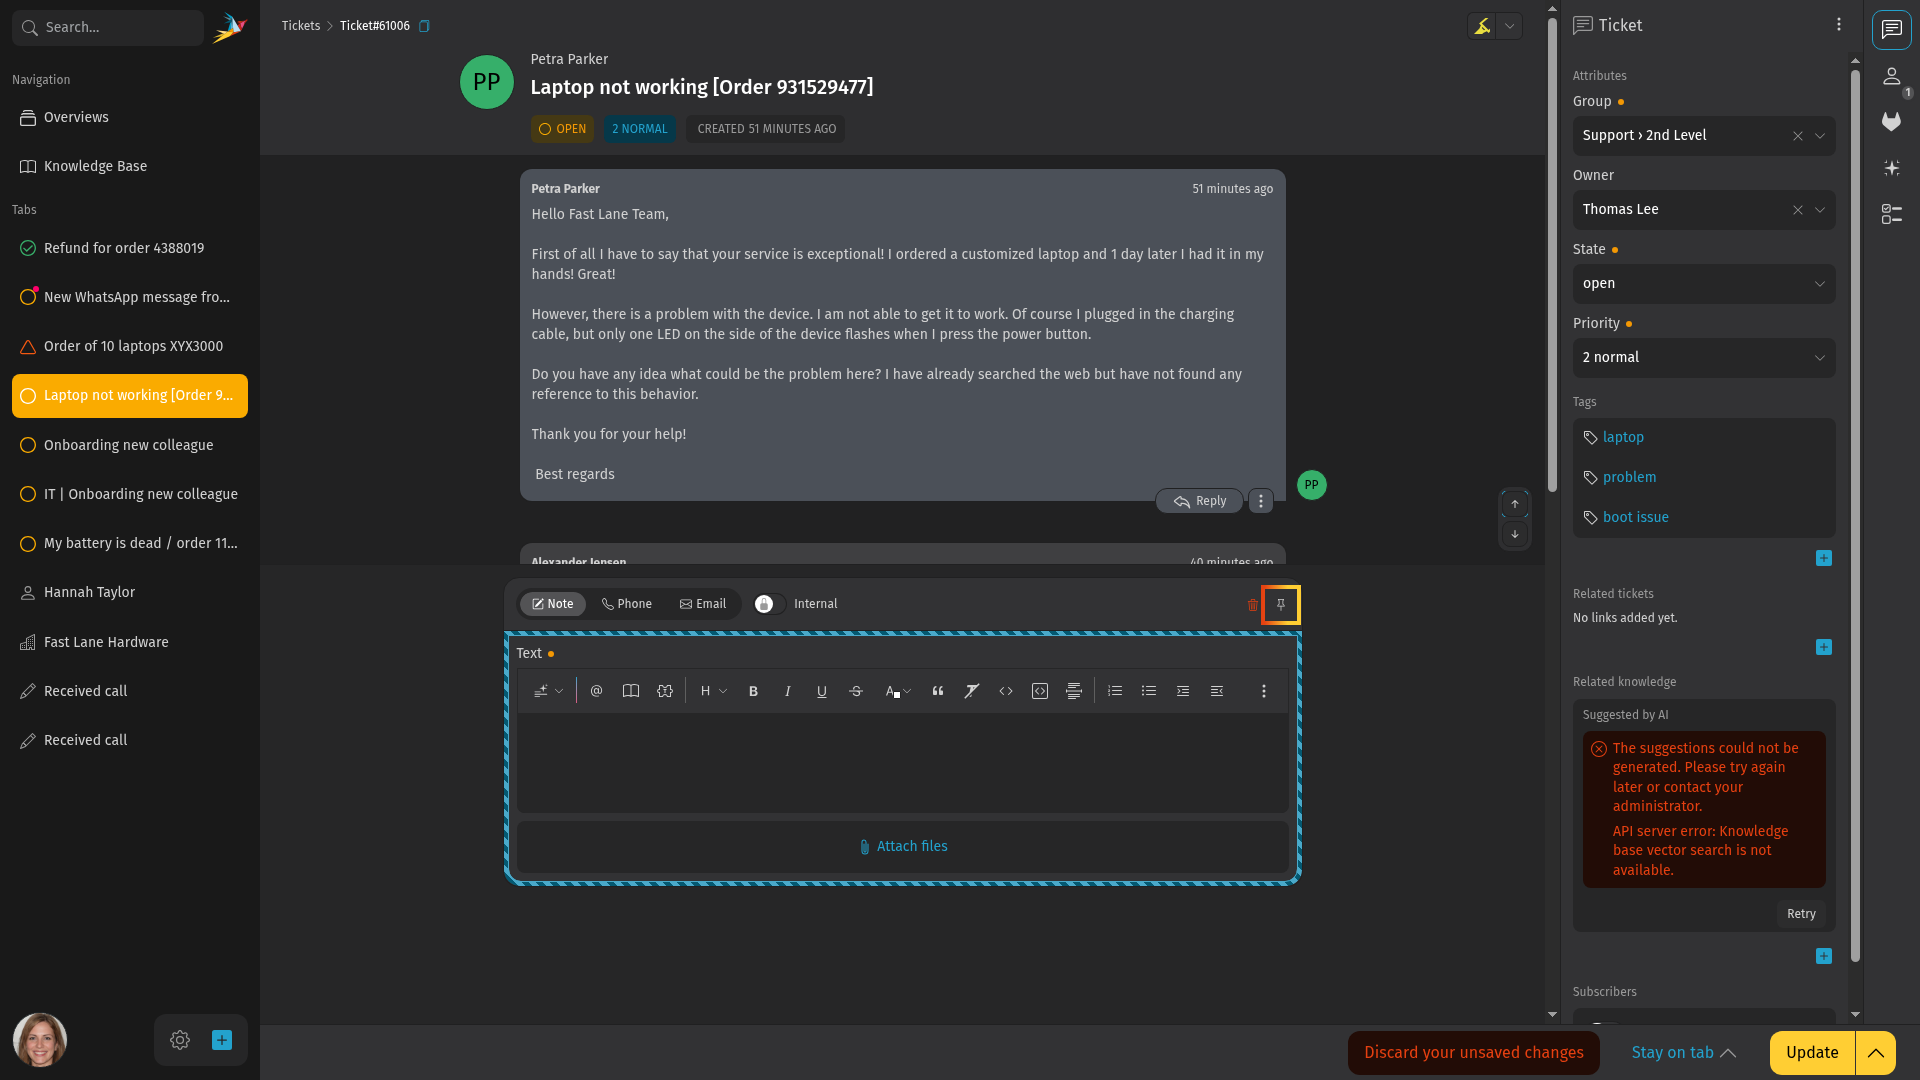
Um einen anderen Artikeltyp auszuwählen, verwenden Sie den Kanal Tab-Umschalter und wählen Sie einen anderen Typ aus. Klicken Sie auf das Schloss-Symbol, um die Sichtbarkeit des Artikels zu ändern. Artikel mit interner Sichtbarkeit werden mit einem gestrichelten blauen Rahmen angezeigt.

Um Text zu schreiben und zu bearbeiten, nutzen Sie die umfangreichen Editor-Funktionen. Um Text zu formatieren und spezielle Funktionen aufzurufen, können Sie entweder die Symbolleiste oder Tastaturkürzel verwenden. Aufgrund der Vielzahl der Funktionen und ihrer Bedeutung finden Sie weitere Informationen auf einer separaten Editor-Seite.
Jeder neue Artikel erscheint am Ende der Konversation, d.h. unterhalb der bestehenden Artikel. Um detaillierte Informationen zu einem Artikel zu sehen, klicken Sie auf einen bestehenden Artikel, was zusätzliche Metainformationen öffnet.
Sie fragen sich jetzt vielleicht, wie Sie Artikel löschen können. Die Antwort ist, dass Sie nur Artikel löschen können, die Sie selbst erstellt haben und die nicht älter als 10 Minuten sind. Um die Funktion Artikel löschen für Kommunikations-Artikel (E-Mails, Anrufe) im Menü zu sehen, müssen Sie deren Sichtbarkeit zunächst auf "intern" umstellen.
Leeren Artikel hinzufügen
Klicken Sie auf die Schaltfläche Interne Notiz hinzufügen unter den Artikeln des Tickets. Dadurch wird der Editor mit aktiviertem Notiz-Typ und interner Sichtbarkeit geöffnet. Sie können den Typ oder die Sichtbarkeit bei Bedarf ändern. Um den Kunden direkt zu antworten oder einen bestimmten Artikel weiterzuleiten, verwenden Sie die entsprechenden Schaltflächen unter einem Artikel. Lesen Sie den nächsten Abschnitt für weitere Informationen.

Auf einen Artikel antworten
Um einen Artikel weiterzuleiten oder zu beantworten, verwenden Sie eine der Antwort-Schaltflächen unter dem Artikel oder im Menü. Das Verhalten ähnelt dem Verhalten eines E-Mail-Clients.
- Antworten: Ermöglicht Ihnen, auf den Artikel zu antworten. Der Empfänger wird automatisch gesetzt. Die Antwort wird über denselben Kanal wie die ursprüngliche Nachricht gesendet. Auf diese Weise können Sie ganz einfach eine Antwort an einen Kunden oder an Dritte senden, falls diese beteiligt sind.
- Allen antworten: Wie oben, jedoch werden alle Empfängeradressen aus der ursprünglichen Nachricht als Empfänger für Ihren neuen Artikel verwendet. Nur für E-Mail-Kanäle verfügbar.
- Weiterleiten: Damit können Sie die ursprüngliche Nachricht an einen beliebigen Empfänger weiterleiten. Die ursprüngliche Nachricht und die Anhänge sind in Ihrem neuen Artikel enthalten.

Zammad ermöglicht es Ihnen sogar, aus einem bestehenden Artikel Text zu zitieren. Dies ist besonders hilfreich, wenn sich eine Antwort auf verschiedene Teile der ursprünglichen Nachricht bezieht oder der Text ziemlich lang ist. Diese Funktion ist auf Artikel des Typs Kommunikation wie E-Mail beschränkt, bei denen die Antwortschaltflächen verfügbar sind. Um Text zu zitieren, markieren Sie einfach den Text, den Sie zitieren möchten, und verwenden Sie die Funktion Antworten oder Allen antworten. Dadurch wird der ausgewählte Text mit einem Zeitstempel in Ihren Artikel-Editor eingefügt, wo Sie ihn beantworten können. Sie können die Zitierfunktion sogar mehrfach verwenden, um verschiedene Teile des Textes zu zitieren. Wählen Sie einfach einen anderen Teil des Textes aus, klicken Sie auf die gleiche Antwortaktion wie zuvor, und er wird als weiteres Zitat zu Ihrem Editor hinzugefügt. Sie können Zitate aufteilen, indem Sie enter oder shift + enter im Editor drücken und das Zitat-Format für Ihren Text deaktivieren.
Wenn das Ticket eine lange Artikelhistorie hat, lesen Sie in Bearbeitung großer Tickets weiter, um mehr über die von Zammad bereitgestellten Komfortfunktionen zu erfahren.
Bearbeitung großer Tickets
Bei der Bearbeitung von Tickets mit umfangreicher Artikelhistorie – wie beispielsweise bei langen E-Mail-Verläufen, bei denen Sie auf frühere Nachrichten zurückgreifen müssen – bietet Zammad zwei praktische Funktionen:
- Eine schwebende Aktionsleiste für Tickets in der unteren rechten Ecke der Artikelliste zeigt je nach Scrollposition und dem Status des Tickets Schnellaktionen an. Sie enthält Schaltflächen mit Symbolen für die folgenden Aktionen:
- Interne Notiz hinzufügen: Öffnet das Antwortformular, in dem Sie eine Notiz verfassen können.
- Zum Start scrollen und Zum Ende scrollen: Springen Sie zum Anfang oder zum Ende der Artikel-Liste. Falls ungelesene Artikel vorhanden sind, zeigt die Zum Ende scrollen-Schaltfläche einen Zähler an und ändert sich zu Zu ungelesenem Artikel scrollen.
- Die Symbolleiste wird angezeigt, sobald die Liste der Artikel größer ist als Ihre Ansicht, damit wichtige Funktionen weiterhin zugänglich bleiben.
- Ein angeheftetes Antwortformular, sodass der Editor sichtbar bleibt, während Sie durch die Artikelliste scrollen. Um das Antwortformular anzuheften oder abzulösen, klicken Sie auf das Stecknadel-Symbol in der Kopfzeile des Artikel-Antwortformulars. Das angeheftete Formular bleibt am unteren Rand der Ticket-Detailansicht angezeigt. Passen Sie die Höhe an, indem Sie die Linie am oberen Rand des angehefteten Antwortformulars ziehen. Der Anheftstatus sowie die Größe des angehefteten Bereichs werden in Ihrem Browser gespeichert.
Ein Ticket umbenennen
Um ein Ticket umzubenennen, klicken Sie einfach auf den Titel in der Kopfleiste und beginnen Sie zu tippen. Dieser Titel wird in der E-Mail-Kommunikation als Betreff verwendet und erscheint an verschiedenen Stellen, z.B. in Übersichten. Bestätigen Sie mit enter oder klicken Sie auf die Schaltfläche auf der rechten Seite.
Ticket-Nummer kopieren
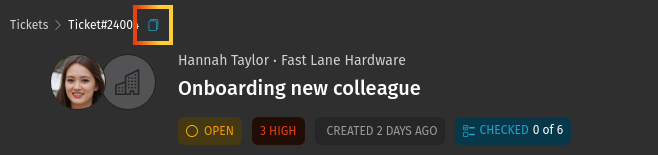
Um die Ticketnummer einschließlich eines Links zum Ticket zu kopieren (z.B. um sie in eine Chat-App einzufügen), verwenden Sie das Symbol  neben dem Titel des Tickets. Es kopiert die komplette Ticket-Nummer mit der Ticket-Kennung in die Zwischenablage, z.B.
 Ticket#50071. Wenn Sie den Inhalt in ein Ziel einfügen, das HTML verarbeiten kann, wird zusätzlich ein Link zum Ticket eingefügt. Wenn Sie nur die Ticket-Nummer einfügen möchten, verwenden Sie ein unformatiertes Einfügen per ctrl shift v.
Aber halt, es gibt sogar ein Tastaturkürzel dafür! Drücken Sie einfach . in der Ticket-Detailansicht und die Ticket-Nummer wird in Ihre Zwischenablage kopiert. Um auch den Titel des Tickets zu übernehmen, drücken Sie zweimal .. Beispiel: Ticket#31004: Einarbeitung eines neuen Kollegen.
Gleichzeitige Ticketbearbeitung
Es kann vorkommen, dass zwei oder mehr Agenten ein Ticket gleichzeitig öffnen. Um Bearbeitungskonflikte zu vermeiden und zu verhindern, dass Kunden widersprüchliche Antworten erhalten, zeigt Ihnen Zammad an, wer das Ticket gerade anschaut oder bearbeitet. Sie finden diese Information in der unteren Leiste, wo die Avatare aller Agenten angezeigt werden.
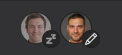
Achten Sie darauf, mit Ihren Kollegen zu kommunizieren, um diese Probleme zu vermeiden, bevor sie entstehen. Abhängig von einem zusätzlichen Symbol oder der Abdunklung eines Avatars unterscheidet sich die Bedeutung:
- Avatar: Ein anderer Agent sieht sich das Ticket an.
- Abgedunkelter Avatar: Ein anderer Agent hat das Ticket geöffnet, sieht es aber gerade nicht aktiv an.
- Avatar mit Stiftsymbol: Ein anderer Agent arbeitet gerade aktiv an diesem Ticket.
Es gibt noch weitere Symbole, die zusätzliche Status der anderen Agenten darstellen (z.B. Ticketanzeige über die mobile Benutzeroberfläche oder Benutzer außer Haus). Fahren Sie einfach mit der Maus darüber, wenn Sie sich nicht sicher sind, was es bedeutet.
Ticket-Aktionen
Weitere Aktionen sind über das Menü in der Seitenleiste des Tickets verfügbar.
- Historie
- Hier finden Sie eine umfassende Liste der Aktualisierungen des Tickets, die von beliebigen Benutzern seit Erstellung vorgenommen wurden. Nützlich, um zu prüfen, wer was und wann getan hat.
- Zusammenfassen
- Übertragen Sie alle Nachrichten/Notizen in ein anderes Ticket. Nützlich, wenn Sie mehr als ein Ticket zu einem einzelnen Kundenproblem haben. Siehe Tickets zusammenfassen für weitere Informationen.
Kunden ändern: Weisen Sie das Ticket einem anderen Kunden zu.
Sie kennen nun die Grundlagen und wissen, wie man mit Tickets im Allgemeinen arbeitet. Es gibt jedoch noch viele weitere Funktionen in Zammad, die für Ihre tägliche Arbeit sehr nützlich sein können. Lesen Sie weiter unter Erweiterte Funktionen, um mehr zu erfahren.