Advanced Features
This page features a collection of various helpful tools that don't need their own separate pages. Just keep reading, search the page or navigate to the section you want using the table of contents on the right.
Ticket Update Behavior
Why?
It is possible to automatically close a ticket tab in the navigation sidebar after updating a ticket. This saves you a click after updating or updating a ticket to closed state.
How?
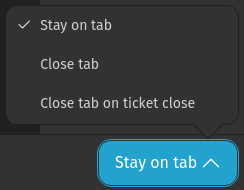
In the footer bar of the ticket detail view, click on the Stay on tab ^ button and select your desired option (if the default is still set, otherwise it is labeled as the other options below). You have different options:
- Stay on tab: Default option. You have to manually close the tab if you want to remove it from your navigation sidebar.
- Close tab: This option closes the tab on each update of the ticket. Might be a good option if you have to deal with many tickets and/or the tickets require many interactions.
- Close tab on ticket close: This option only closes the tab when the ticket is updated to the closed state.
TIP
If your situation differs from ticket to ticket, you can leave Stay on tab and use the keyboard shortcut shift c for changing the ticket state to closed and close the ticket tab.
Text Modules
Why?
If you have to answer the same question again and again, ask your Zammad admin to create such a text module for you. They can even include variables like customer name or any other available attribute which get replaced while using it in a ticket. The usage of text modules has benefits like:
- You save time while answering tickets
- Answers from you and your colleagues are aligned because you use the same text for answers
How?
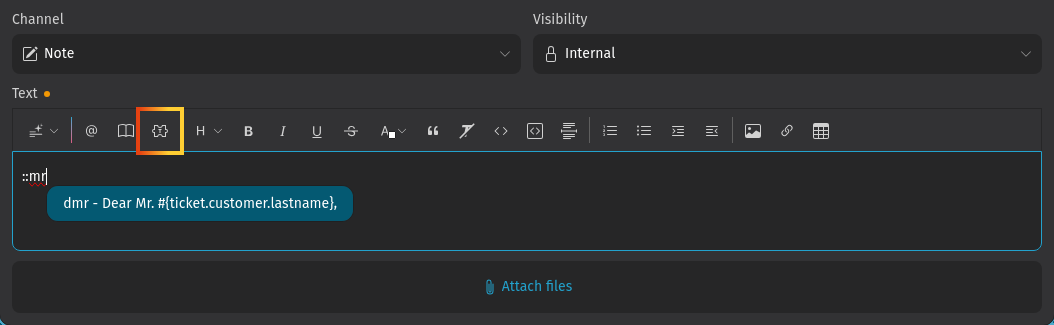
Use the button in the toolbar of the editor or simply write :: in the editor. Both ways let you search for the desired text module by typing some characters or words of the text or keywords of the text module.
You can pick one by clicking on it or by using the up and down arrows followed by enter on your keyboard. There are some text modules in Zammad which are shipped by default.
Insert Knowledge Base Article
Why?
If you often have the same or very similar customer requests about an issue of which a knowledge base article exists. This saves you time because you don't have to switch to the knowledge base and copy/paste content.
How?
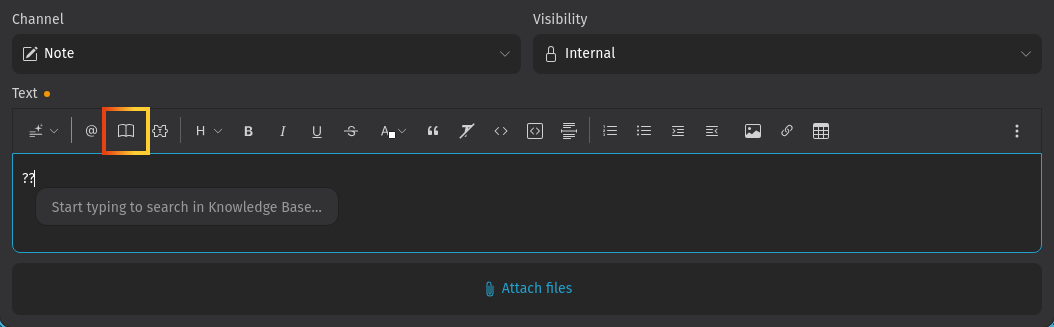
Use the button in the toolbar of the editor or simply write ?? in the editor. Both ways let you search for the desired knowledge base article by typing some characters or words.
Mention a User
Why?
Ask or request information from your colleagues or mention them in important tickets so they receive notifications for ticket updates and are automatically subscribed to this ticket.
How?
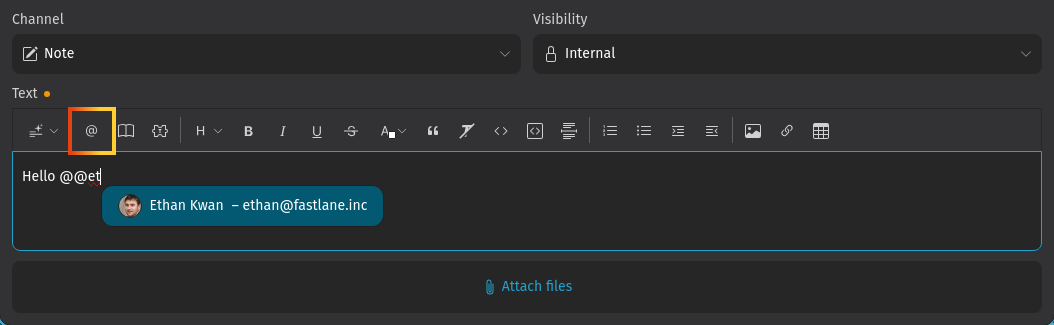
While writing a ticket article, use the button in the toolbar of the editor or simply type @@. Both ways let you search for the name of the user you want to mention by typing some characters or the complete name.
Zammad displays a list with all possible matches where you can pick one by clicking on it or by using the up and down arrows followed by enter on your keyboard.
Subscribe to a Ticket
Why?
If you are interested in the progress of a ticket, you are not the owner, you can subscribe to it. This means you will receive notifications for each update.
How?
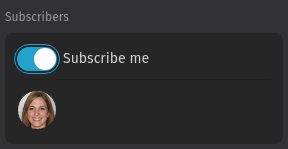
Activate the "Subscribe me" toggle in the ticket side panel to get notifications. If you have been mentioned in a ticket, you are automatically subscribed. Switch the toggle off to stop the notification. The avatars displayed show you who has subscribed to the ticket and is therefore notified of updates.
Macros
Why?
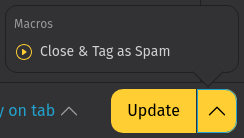
If you have many steps you do over and over again, you should use a macro for that. In such a macro, your admin can pre-define different ticket actions you can apply with just a click. As an example, Zammad ships a "Close & Tag as Spam" macro by default. If applied, the user who executes the macro is assigned as owner, a tag spam is added and the ticket is closed. It is even possible to run an AI agent within a macro on demand.
How?
If your admin already created a macro, you can execute it in the ticket detail view by clicking the ^ section of the Update button in the right corner of the footer bar (see screenshot above) and select the macro you want to execute.
WARNING
The macro gets executed immediately and without an additional confirmation!
You can also apply a macro to several ticket at once. Have a loot at bulk actions how to do that.
Checklists
Why?
- To keep track of tasks
- To complete tasks in a structured way
- To make sure nothing gets forgotten
- To make the progress of work more visible
How?
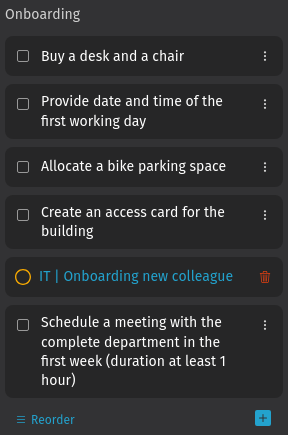
Select the Checklist tab in the sidebar. If you can't see it, your Zammad admin disabled it. You can only add or edit a checklist, if you have the permission to edit the ticket.
In the checklist sidebar, you can:
- Add a checklist: either by creating a new one by clicking on
Add Empty Checklistor from a template by usingAdd From a Template(if you don't see the template button, there is none). - Edit the current checklist:
- Rename it by clicking on the title or using the menu in the sidebar header.
- Add checklist items by clicking the button.
- Change the text of the checklist items, either by just clicking on it or using the menu next to the item.
Reorderthe items by clicking this button and drag & drop the items.
- Delete the complete checklist by using the menu in the sidebar header.
There are two features, which are not directly visible:
- You can refer to other tickets as a checklist item by using its hook and number in the item text (e.g.
Ticket#123456). Such items can't be checked manually, they reflect the state of the referred ticket.TIP
Fetch the ticket hook and number by going to the desired ticket and either use the copy button
 in the header or use the keyboard shortcut .. Then you can paste it in the checklist you want to have it included.
 - Zammad automatically checks if all checklist items are completed. The check is performed when you set a ticket to "closed". If not all items are completed, Zammad will prompt you to either work on the remaining tasks and keep the ticket open or to close it anyway. When referencing other tickets in your checklist, only those which are closed (with a green circle) are considered as completed.
Ticket Templates
Why?
Quickly create a ticket with pre-defined attributes like title, text, tags and more saves you time. This requires your admin to create a ticket template.
How?
In the ticket create screen, you can find an Apply Template ^ button in the footer bar, if a template is available. Select the template you want to apply and apply changes if desired.
Shared Drafts
Why?
To share a draft with other agents of your group, e.g. to reflect a QA process, instead of "just" adding an internal article. In such a draft you can even include changed ticket attributes like priority, state and custom attributes as well as an article with an answer to the customer.
This is an optional feature. If you can't see it, your admin has turned it off.
How?
To save a draft, use the menu in the footer of the ticket details view and select "Save as draft".
To apply an already existing draft, click on the Draft Available button on the left side of the footer.
WARNING
Applying a draft overwrites your unsaved changes!
Monitoring Ticket Escalations
Why?
Service Level Agreements (SLAs) ensure timely responses to customer requests. Your administrator sets such goals as responding to all inquiries within eight hours, with optional custom deadlines for specific customers. When such a deadline is passed, the ticket escalates.
How?
Zammad notifies you by default when tickets approach or exceed their deadlines. Configure these notifications in your profile settings. Zammad also ships a default overview called "Escalated Tickets". This overview includes already escalated tickets and tickets which are expected to escalate within the next 10 minutes.
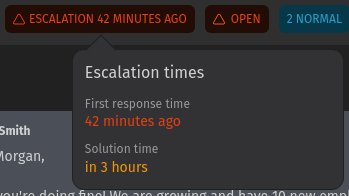
SLA-relevant tickets display a timestamp in the ticket detail header. Hover over this timestamp to see all escalation stages and deadlines in a popup. It shows all upcoming or reached escalation times based on your SLA configuration:
INFO
The escalation times are calculated based on your business hours. This means when your business hours start at 9:00, a ticket is created at 7:00 and you have an 1-hour deadline, it will escalate at 10:00, unless resolved earlier.
The SLA feature requires a configuration from your admin. In case you don’t see escalation timestamps, either the ticket is not SLA-relevant or the feature is not configured.
Bulk Actions
Why?
If you have to apply the same changes for many ticket, you can save time!
How?
There are 2 places where you can apply bulk actions:
- In the ticket tab in the detailed search page
- In Overviews
In both places, you can apply bulk actions in different ways:
- By using the side panel
- By using the drag & drop overlay
To use bulk actions, first select the tickets you want to apply the changes to. Either select the tickets individually by clicking on the checkbox next to them or use the checkbox in the header to select all tickets of the current page. After selecting all tickets of the page, you can even select all tickets which match your current search query or overview condition by clicking on the Select all XX results label. The maximum number of selectable tickets for a bulk action is 2000.
To select a section of consecutive tickets, click on the checkbox of the first ticket, then hold shift and click on the checkbox of the last ticket. This selects all tickets in between as well. This also works for unselecting tickets.
Depending on the number of affected tickets, you might see a small notification after triggering a bulk action, informing you about the progress. The bulk action is performed in the background so you can work on other tickets. However, until the bulk action is finished, you are not able to start a new bulk action.
Side panel:
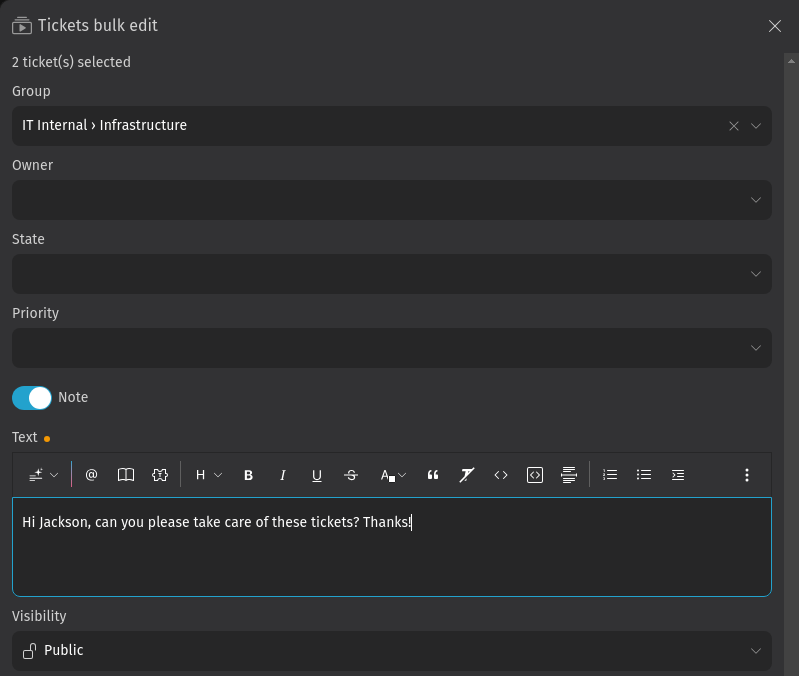
After you selected tickets, click the Bulk Action button in the top right corner and change/add attributes by using the fields in the right side panel. The available changes you can apply to tickets are:
- Set group
- Set owner
- Set state
- Set priority
- Add a note
- Execute a macro
Drag & drop with bulk overlay:
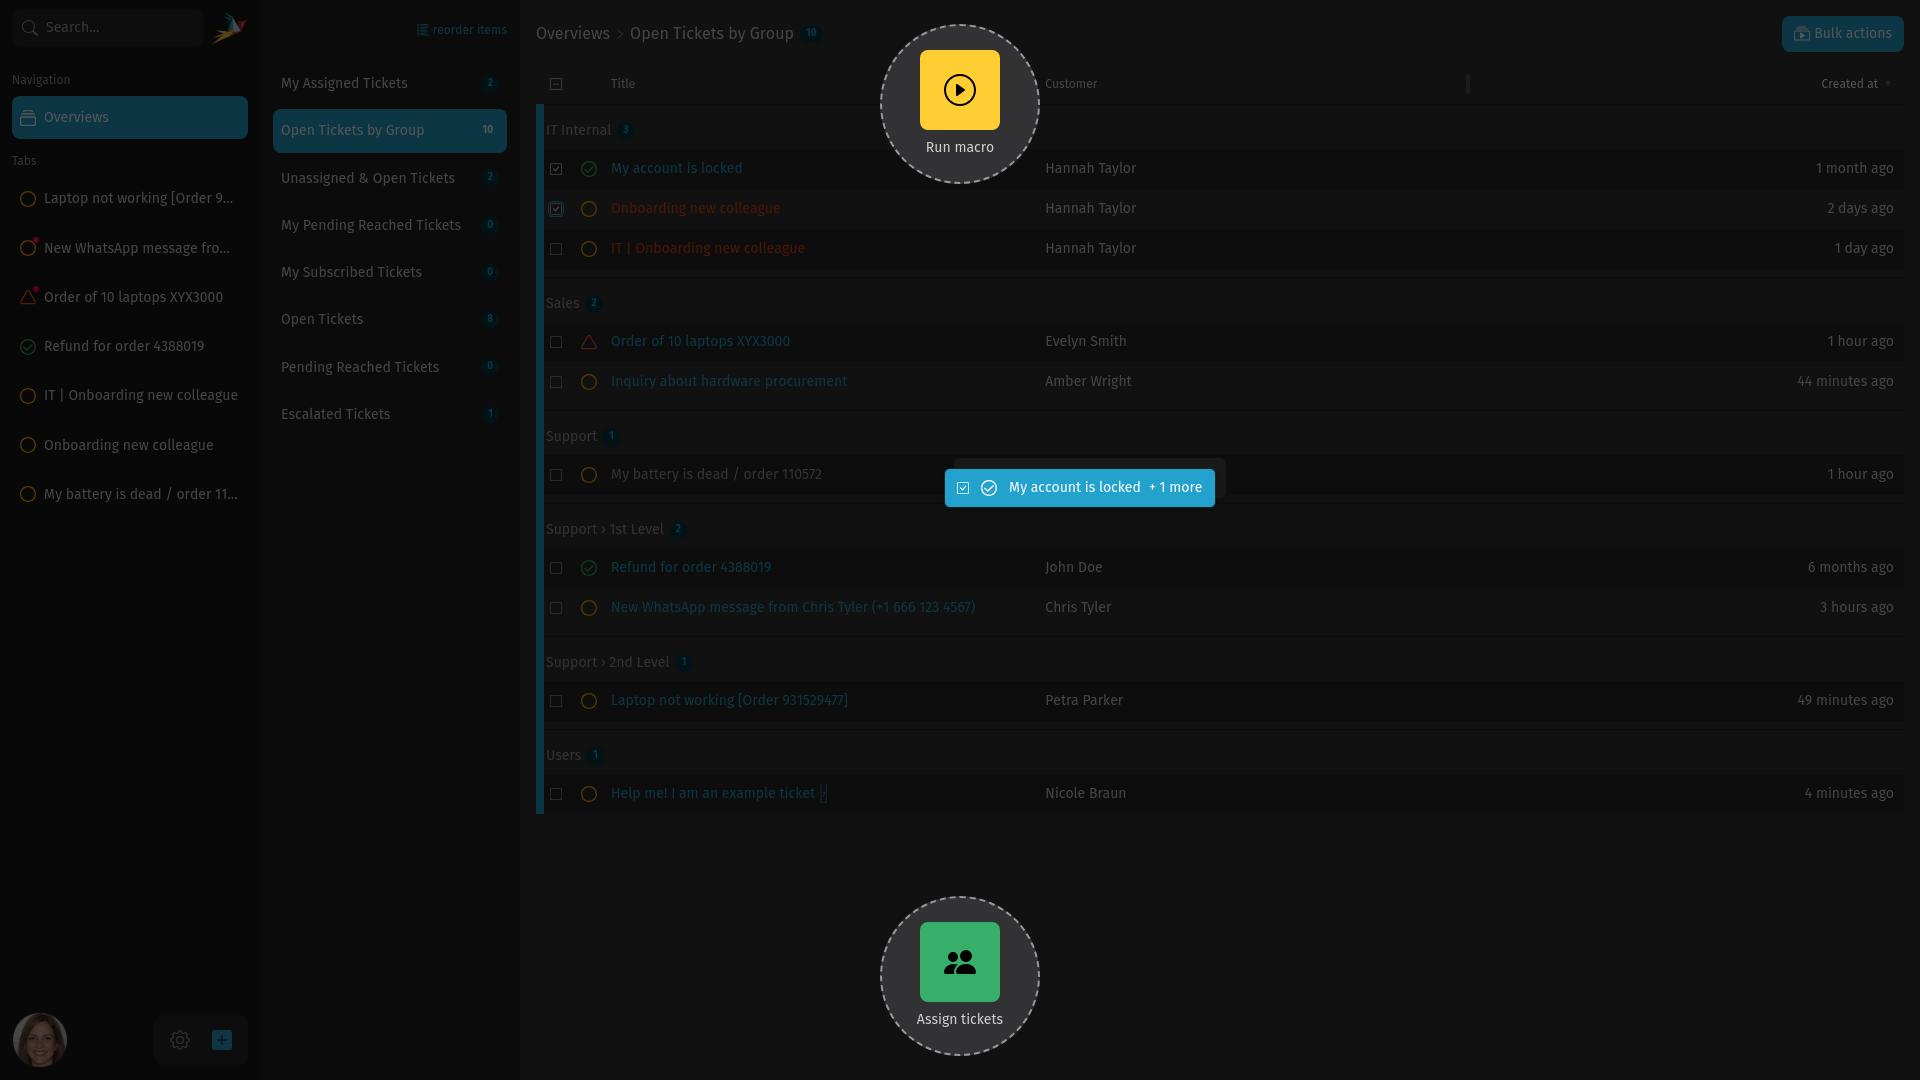
After you selected tickets, drag them by pressing and holding the mouse button and drop them on the desired action in the bulk action overlay. You can always skip this by dropping the tickets in the middle of the page. The available actions you can apply to tickets are:
- Set group
- Set owner
- Unassign owner
- Unassign owner and set group
- Run macro
Start your drag and drop action from one of the already selected tickets in case you selected all relevant ones. To include another unselected ticket, start dragging from there and so it is also included in the batch processing.
Merge Tickets
Why?
If you have two or more tickets about the same issue, you may want to merge those tickets into one. This might be the case if a customer sends you a new email which can't be assigned to the existing ticket (e.g. the ticket reference is missing because the customer sends you a completely new email instead of answering in the existing thread).
Merging a ticket migrates all messages and notes of the ticket from where you select the merging into the selected one.
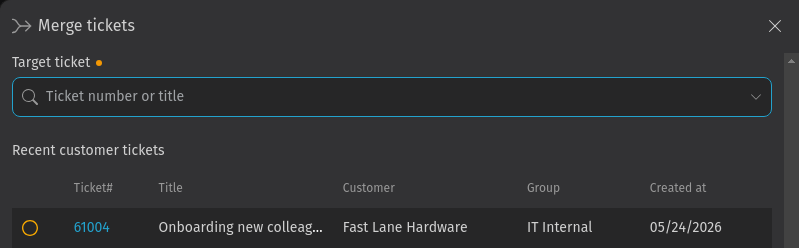
How?
Go to the ticket you want to merge into another one. In the ticket sidebar, use the menu and select Merge. This opens a side panel in which you can select a ticket by clicking on it or enter a ticket number in search field. When you selected a target ticket, confirm by using the Merge button at the bottom.
As result, the articles are moved into the chosen ticket. The ticket in which you executed the merge still exists with the following changes:
- The articles have been replaced by a "merged" label
- The state has changed to "merged"
- The ticket is linked to its "parent" ticket
Split Tickets
Why?
If you have a ticket which is about more than one issue, you might want to split it in two or more separate tickets. For example, this might be the case if a customer has a technical question and wants to place an order.
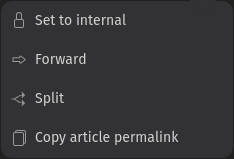
How?
To split an article off, use the menu next to an article and select Split.
This results in a ticket create screen with the same attributes set as in the initial ticket. The content of the article is also included. You can change everything to your needs and then click on Create.
The just created ticket is linked in the original one as child. The original ticket is linked in the split off ticket as parent.
Link Tickets
Why?
When tickets about related issues arise, they can be linked to each other for easier reference. Merged and split tickets are automatically linked.
How?
In the ticket sidebar, add a link to another ticket by clicking the button in the Related tickets section. This opens a side panel in which you can select a ticket by clicking on it or enter a ticket number in search field. Additionally, you can choose between different link types:
- Normal: for related ticket which have no hierarchy.
- Parent/Child: for related tickets where one is the main issue and the other is a subtask. This link type is used by default if a tickets gets split or merged.
Duplicate Detection
Why?
Sometimes, it happens that a customer reaches out to you (or colleagues) more than once about a single issue. To avoid creating duplicate tickets, Zammad can warn you when another ticket is already present. This feature has to be activated and configured by your admin.
How?
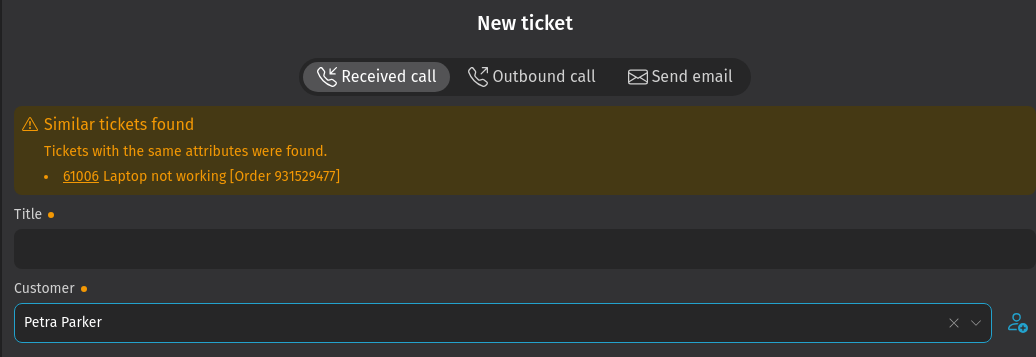
Just create a new ticket and provide some information. Your admin can configure which ticket attributes must match for the warning to show up (e.g. customer and title). In case of many unnecessary warnings or no warning at all, ask your admin to adjust the attributes to compare.
When a duplicate is detected, a warning in the ticket shows up (see the example in screenshot above). This warning can contain a ticket number. Click on the ticket link to see what it is about. In case it is no duplicate, simply ignore it and continue with the ticket creation.
Time Accounting
Why?
With Zammad's integrated time accounting, you can help to keep track of how much time you spent on tickets. Based on the accounted times in the ticket, it is automatically assigned to customers and organizations. This might be used in your company for billing or to keep track of support budgets.
How?
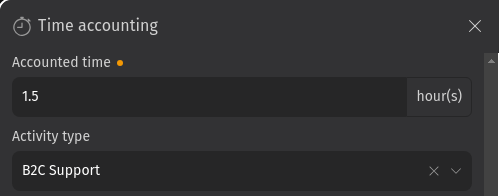
After updating a ticket, a time accounting dialog will appear. Enter how much time you spent on the ticket.
The feature is optional. If you don't see it whenever you update a ticket, your administrator hasn't enabled it yet or the rule for tickets to be taken into consideration doesn't match.
The accounted time is always recorded and stored without a unit. However, your administrator may decide to show an optional label next to the field to hint you and your colleagues in which unit the time is expected (see screenshot).
Activity types can be used to distinguish between different activities and for grouping the accounted times. If this optional feature is active, it shows a list of activities from which you can select in the time accounting dialog.
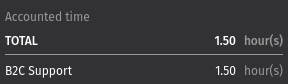
If a ticket already has accounted time(s), you can see it in the ticket sidebar on the right side in the ticket detail view at the bottom. You can find the calculated sums of each activity type (if configured) as well as the total sum of accounted times for all activity types.
User Detail Panel
Why?
Viewing important customer/user information at a glance without leaving your current view allows you to stay focused on your task.
How?
You might have seen it already: simply hover your mouse over an avatar icon, no matter if it is in the header, footer, main content or the content sidebar in the ticket detail view. To see more details, click on the user avatar to open the user detail page.
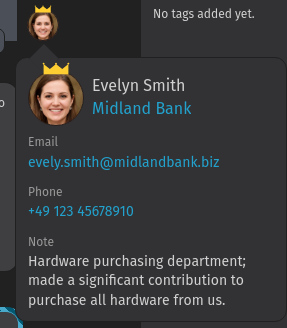
By the way, the crown in the screenshot represents the customer's VIP state, which can be set in the customer detail view and the admin settings.
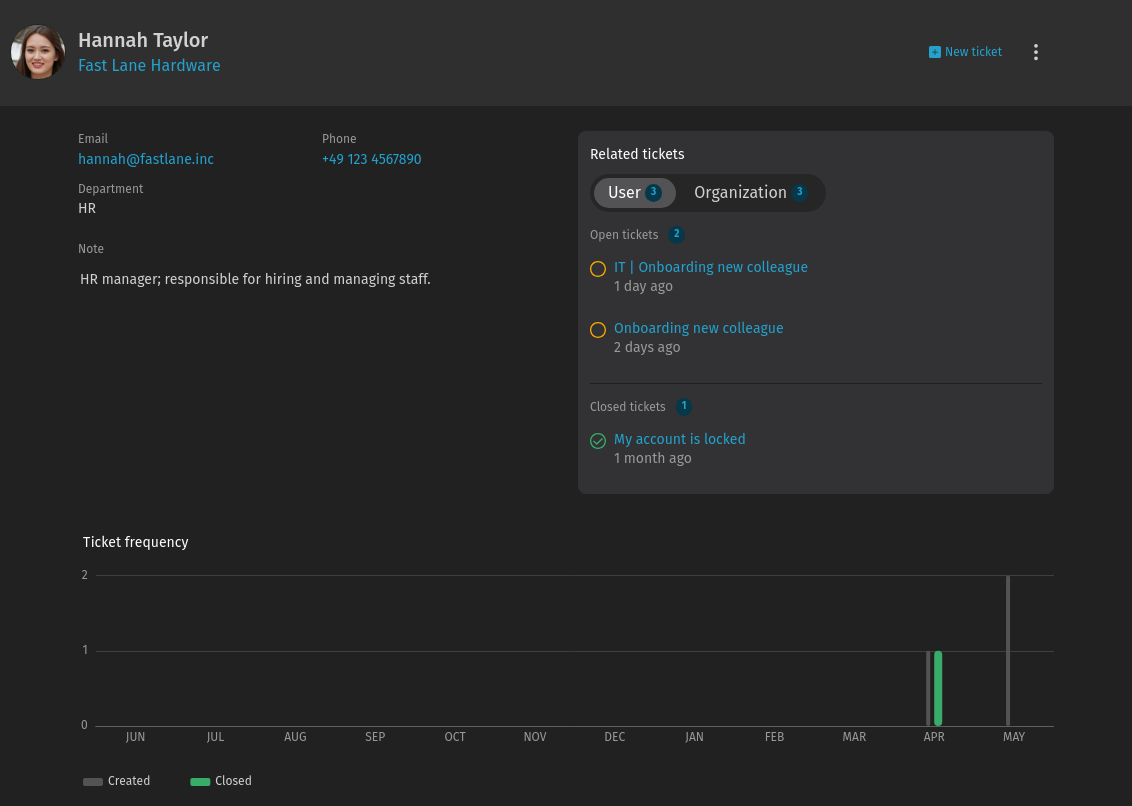
User Detail Page
Why?
It allows you to see all relevant user information in one place. Examples what you can find and do there:
- See organization membership
- See a graph of recent tickets
- Add or edit a note
- Edit the customer (via menu)
- See a history of changes (via menu)
- Create a new ticket with this user as customer
How?
Simply click on a user avatar (e.g. in the header of the ticket detail view). This opens a new tab with the customer detail page. In case you also have admin permissions, you can even create a deletion job for a user from the menu.
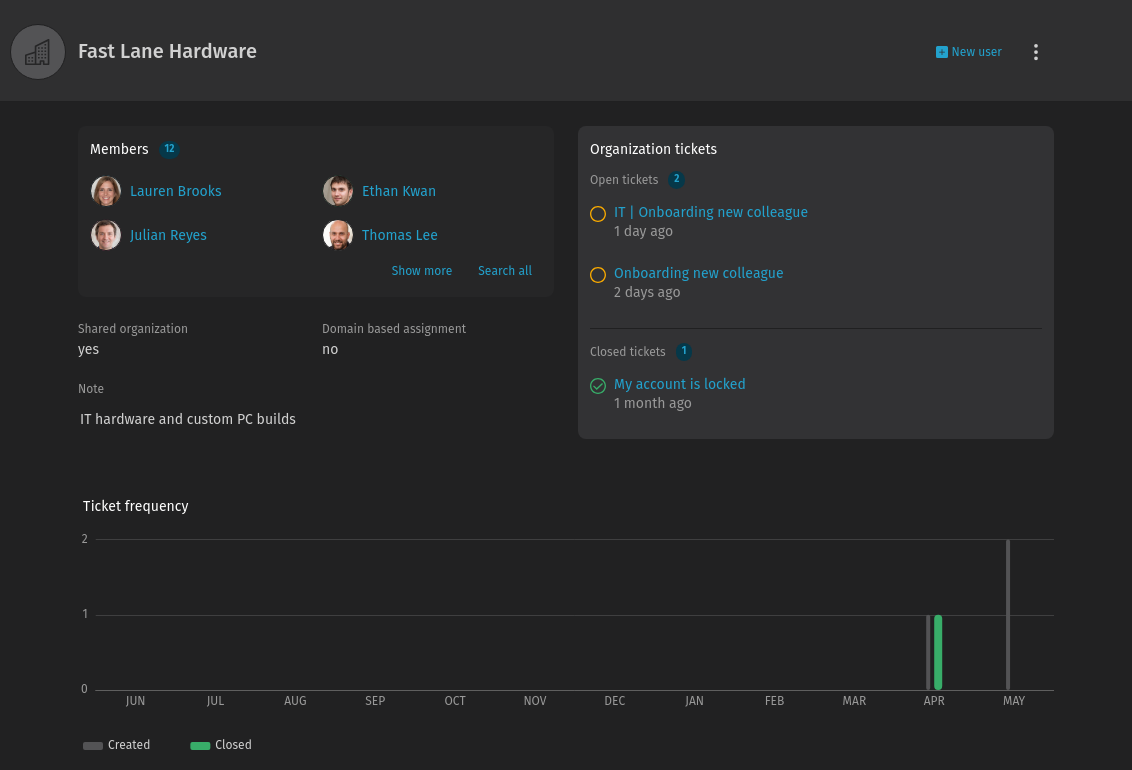
Organization Detail Page
Why?
It allows you to see all relevant organization information in one place. Examples what you can find and do there:
- See the members of the organization
- See a graph of the recent tickets of the whole organization
- Add or edit a note
- Edit the organization (via menu)
- See a history of changes (via menu)
- Create a new user as a member of this organization
How?
Simply click on an organization avatar (e.g. in the header of the ticket detail view next to the user avatar). This opens a new tab with the organization detail page.
External Issues and Assets
Why?
If you use i-doit and Zammad for IT support or you deal with Github or Gitlab issues, you can link to these external systems to have all relevant information in one place. Your Zammad admin has to activate and configure these features in Zammad's settings.
How?
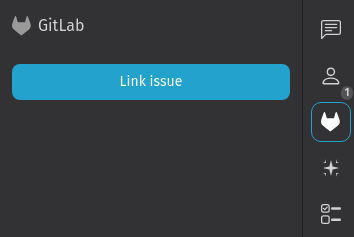
If activated, simply open a ticket and choose the right content sidebar tab with the respective icon (see Gitlab example in screenshot above). Click the button to link to an issue by entering the URL of it or select the item from a select field (i-doit). Afterwards, you can see the linked item with additional metadata. By clicking on the linked item, you are redirected to it in the respective system.
Highlight Text
Why?
It allows you to give your colleagues a hint about important aspects of the ticket and to make sure important parts aren't getting overlooked. Be aware that this feature is not about text highlighting for new articles, it is about highlighting text in existing articles for you and other agents.
How?
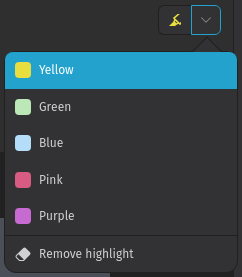
Use the highlighting tool with the pencil icon in the upper right corner in the ticket detail view. To highlight text, either select text first and then click the button. As an alternative, you can click the highlighting button first and then select text. You can choose a different color by using the down arrow on the right side of the button. To remove the highlighting, simply choose the rubber icon from the color menu.