Отварање тикета
When a customer messages you over a channel which is fetched by Zammad, a ticket is created automatically (unless Zammad recognizes it as a follow-up, then it gets added as an article to an existing ticket). However, there might be cases where you need to create a ticket manually. Examples:
- Клијент вас позове телефоном.
- Примите папирно писмо од клијента.
- Клијент посети вашу физичку локацију.
- Желите да проактивно обавестите клијента слањем поруке.
In situations like these, you need to create a new ticket manually and click the button at the bottom of the primary navigation. This shows a ticket create screen where you can add all needed information.
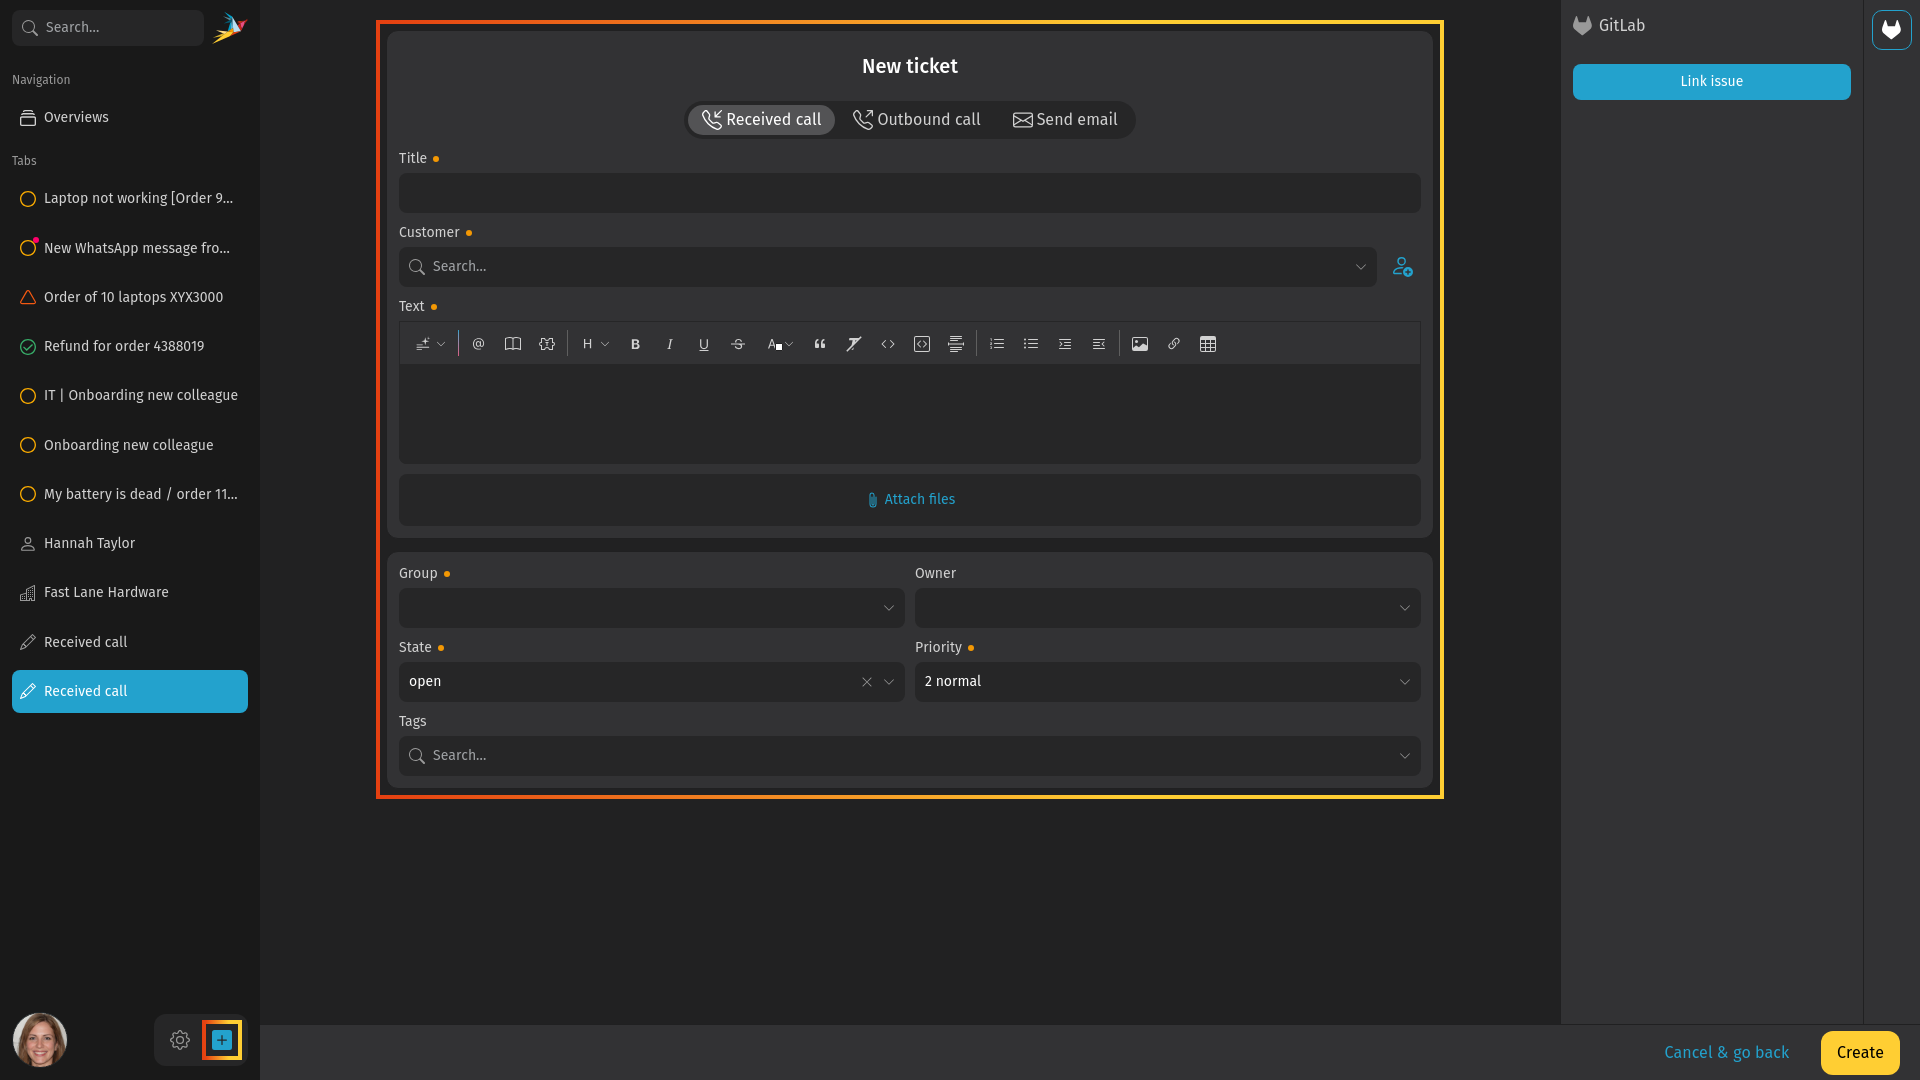
Type Selector
У екрану отварања тикета, можете одабрати различите врсте чланака:
- Received call: for issues initiated by a customer over the phone.
- Outbound call: for issues initiated by an agent over the phone.
- Send email: for issues initiated by an agent over email.
Када одаберете Пошаљи имејл поруку, клијент ће примити имејл поруку са одговарајућим насловом и текстом као садржај.
Наслов
This is the title of a ticket which is shown in many places in Zammad. For example, this gets displayed in overviews. It is also used as the subject for email communication. For emails, a ticket identifier is automatically appended (e.g. Ticket#901234 - I need help!).
Клијент
Enter a name or email address of a customer to search for existing accounts. You can even search for organizations and their members. Select an option from the dropdown menu or create a new customer by clicking the + Create new Customer button on the right side of the field. This opens a dialog where you can provide all relevant information of the customer. A ticket can only have one customer.
After setting a customer in the ticket create dialog, the customer sidebar automatically opens. You can see additional customer meta information including a hint about the currently opened tickets of the customer.
Текст
This is the content section where the currently known details of the issue gets written down. For the "Send Email" type, this is the content/message of the email. To learn more about the editor and its features, check the editor documentation.
Атрибути тикета
As you may know, there are additional ticket attributes such as group, priority and owner that you can set. If you haven't read the ticket basics yet, check it out to learn more.
After you provided the relevant information, finally create the ticket with a click on the Create button. Read on how to work with existing tickets.