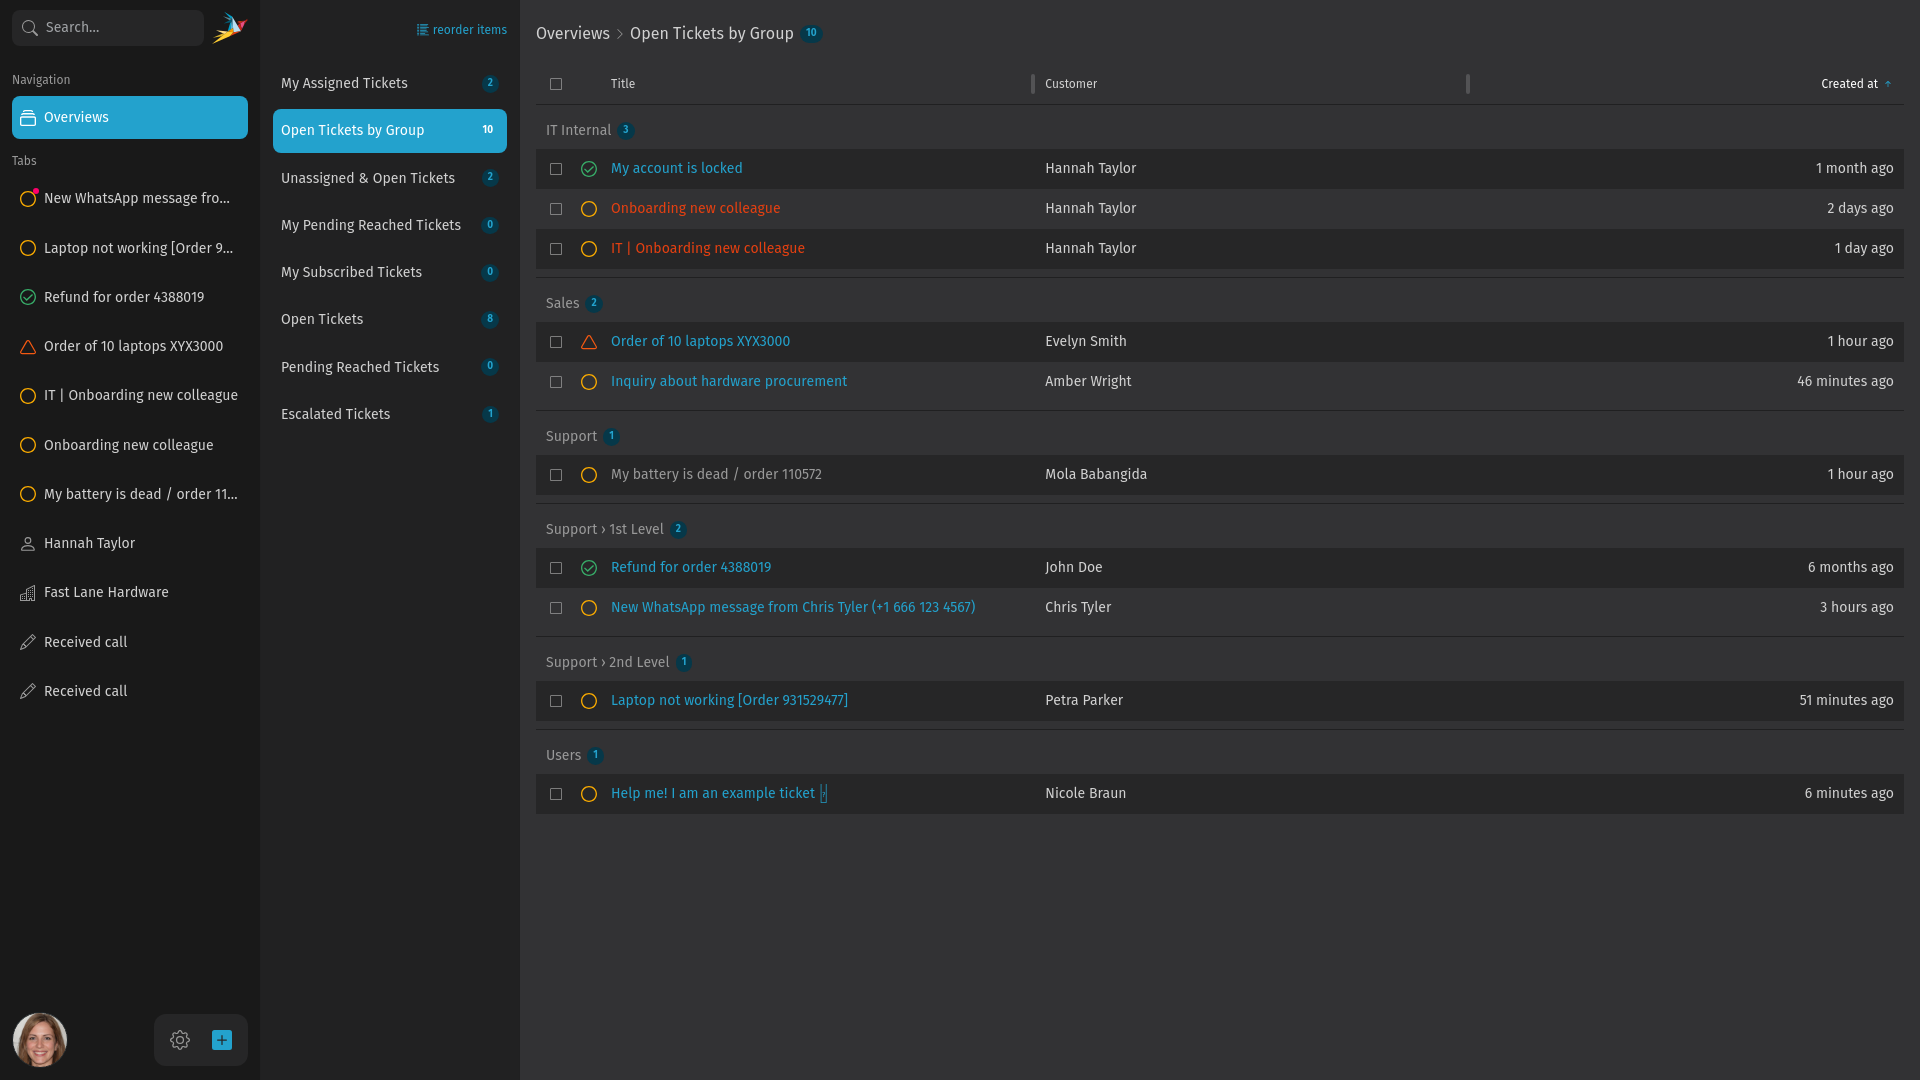
Overviews
Introduction
Overviews are a core component of Zammad. Open them by clicking the Overviews button in the navigation bar or use the keyboard shortcut o. You can think of overviews as a kind of email inbox with different folders. Use them to find new tickets that you want to process and to keep track of tickets that have not yet been completed.
Depending on your system configuration and what your Zammad admin set up, you can find different overviews there, for example:
- Your assigned tickets
- Unassigned and open tickets
- Pending reached tickets
- Escalated tickets
Selecting an overview in the second level navigation shows you a table which includes matching tickets.
Usage and Features
Overviews can be defined by admins based on rules and conditions. That means if a ticket has been changed and the condition of the overview isn't matching anymore, the ticket is no longer visible in this overview.
Overviews are updated automatically. You don't have to reload your browser to observe changes. You can adjust the order temporarily by clicking on one of the column headers as well as change their width by dragging the column dividers. The order is only preserved until you switch to another overview or reload the page.
For each overview, you can find a badge attached. The number in this badge tells you how many tickets are in each overview.
The ticket lists in overviews can also be grouped by a specific attribute (e.g. customer, organization, owner). This has to be adjusted by your Zammad admin. If a grouping is activated, you can find a badge with a counter of the included tickets there as well.
Depending on what you are searching for, select a fitting overview and start working on a ticket.
TIP
If you miss an overview or want to have different settings, let your Zammad admin know!
Color Coded State and Priority
To visualize different ticket states and priorities, the entries in the table are color coded.
The icon next to the ticket title mainly represents the need for action:

- Yellow circle: action needed (e.g. new, open, pending reached)
- Grey circle: paused, no action needed right now (e.g. pending)
- Green circle: no action needed any more (e.g. closed, merged)
- Red triangle: immediate action needed (ticket escalated due to an SLA violation)
If you spot a circle with a blue/pink gradient, it indicates that an AI agent is currently working on the ticket.
The priority is represented by the color of the ticket title:
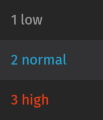
- 1 low: gray
- 2 normal: blue
- 3 high: red
Open a Ticket
Open a ticket by simply clicking on the line. This opens the ticket as a tab in the left navigation bar and shows you the ticket detail view. If this ticket is already present in your navigation bar, it activates this tab instead of opening a duplicate tab.
If an overview contains more than one ticket and you open one of the tickets, you can find arrows in the ticket detail view header to switch to the next/previous ticket of this overview.
Bulk Actions
Perform bulk actions by selecting multiple tickets and either use the drop-down fields or drag them with the mouse to invoke the bulk action overlay. You can find more information about that in the Bulk Actions section in the advanced features page.
Reorder Overviews
If the order of the overviews doesn't reflect your working process or you just like to have a different order, you can re-arrange them for your account. Use the reorder items button at the very top of the second level navigation bar, which opens your profile settings where you can define a custom order for your overviews.
To change the order, simply drag & drop them by clicking the handles on the left side.
If your admin changes the order, your custom order is preserved. You can switch back to your admin's order by clicking the Reset Overview Order button.